


Carpenter ants rank among the most destructive pests in Massachusetts homes. These large black ants don’t eat wood like termites, but they tunnel through it to build their nests. Knowing how to spot them early can save you thousands of dollars in structural repairs.
What Makes Carpenter Ants Different
You’ve got ants in your kitchen. Maybe they’re just nuisance ants looking for crumbs. Or maybe they’re carpenter ants working to hollow out your wall studs. The difference matters.
Carpenter ants are among the largest ants you’ll encounter in New England. Workers range from a quarter inch to half an inch long. Queens can reach three-quarters of an inch. They’re typically black, though some species show reddish-brown coloring on their midsection.
Look at the ant’s body shape. Carpenter ants have a single node, or bump, between their thorax and abdomen. Their thorax curves smoothly when viewed from the side. Regular pavement ants have two nodes and a more angular profile.
The antennae tell a story too. Carpenter ant antennae bend at a sharp angle, like an elbow. Count twelve segments if you can get close enough. This elbowed antenna is a reliable identification feature.
Signs of Carpenter Ant Activity in Your Home
You might never see the ants themselves. They prefer to work at night and stay hidden inside wood. But they leave evidence behind.
Frass is the most common sign. This sawdust-like material consists of wood shavings, dead ant parts, and insect fragments. Carpenter ants push frass out of their galleries to keep the tunnels clean. You’ll find small piles beneath wall voids, under window sills, or near baseboards. The texture is coarse, not fine like actual sawdust.
Listen to your walls. In a quiet house, especially at night, you can sometimes hear carpenter ants working. The sound resembles rustling or crackling paper. Press your ear against a wall where you suspect activity. The noise comes from thousands of mandibles scraping wood.
Winged ants inside your home signal a mature colony. These reproductives, called swarmers, emerge in spring to mate and start new colonies. Finding them indoors, particularly between March and June, means you have an established nest somewhere in the structure. A few swarmers near a window might have entered from outside. Dozens in your basement or bathroom point to an interior colony.
Look for damaged wood in moisture-prone areas. Carpenter ants prefer soft, damp wood because it’s easier to excavate. Check around windows, doors, roof lines, and anywhere water might enter. The wood may appear normal on the surface but feel hollow when tapped.
Where Carpenter Ants Build Nests
Understanding carpenter ant biology helps you find them. These insects need water. A parent colony requires consistent moisture to support eggs and larvae. Satellite colonies can survive in drier locations once workers reach maturity.
The parent colony sits in damp wood. Common indoor locations include:
Wall cavities around plumbing leaks. Sill plates in contact with soil. Window frames with failed caulking. Roof decking under damaged shingles. Porch columns and deck posts. Foam insulation that retains moisture.
Satellite colonies spread from the parent nest. Workers establish these secondary nests in wall voids, hollow doors, and insulation. A single parent colony can support multiple satellites throughout your home.
Outdoor nests in trees, stumps, and landscaping timbers serve as source colonies. Workers forage up to 300 feet from their nest. That dead oak in your backyard could be sending ants into your foundation.
Why Worcester Area Homes Face Higher Risk
Central Massachusetts geography creates ideal conditions for carpenter ants. Our forests contain abundant dead wood for natural colonies. The climate provides enough moisture without extended droughts. Older housing stock means more homes with wood-to-soil contact and aging moisture barriers.
Worcester, Shrewsbury, Grafton, Millbury, and surrounding towns all report high carpenter ant pressure. Homes near wooded areas face constant foraging pressure from outdoor colonies. Properties along rivers and ponds deal with elevated humidity that attracts these pests.
The construction style matters too. Many Central Massachusetts homes feature finished basements, attached garages, and wood decks. Each of these creates potential entry points and nesting sites. Slab foundations offer fewer entry points than homes with crawl spaces or basements.
A few years ago we got a call from a homeowner in Grafton who noticed small piles of sawdust on her basement floor every morning. She’d vacuum them up, and they’d reappear overnight. When we inspected, we found a massive parent colony in the sill plate where a slow plumbing leak had softened the wood. The colony had been active for at least three years. The structural damage required extensive repairs beyond just treating the ants.
Prevention Starts with Moisture Control
Carpenter ants need water. Remove their moisture sources, and you make your home far less attractive to them.
Fix plumbing leaks promptly. Even small drips under sinks create enough moisture to attract carpenter ants. Check supply lines, drain pipes, and fixtures in bathrooms, kitchens, and utility rooms.
Improve drainage around your foundation. Gutters should direct water at least four feet from the house. Soil should slope away from foundation walls. French drains or sump pumps may be necessary in wet areas.
Ventilate crawl spaces and attics. Trapped humid air creates condensation on framing members. Install vents, use vapor barriers, and consider dehumidifiers in problem areas.
Replace damaged wood before it becomes a target. That rotting fascia board or soft window sill will attract carpenter ants. Replace the wood and address whatever allowed the moisture damage in the first place.
There’s a saying among dog lovers that a tired dog is a good dog. The same principle applies to pest awareness. A vigilant homeowner is a protected homeowner. Regular inspection catches problems before they grow severe.
Exclusion Keeps Ants Outside
Integrated pest management, or IPM, emphasizes exclusion as a first line of defense. You can’t treat what doesn’t get inside.
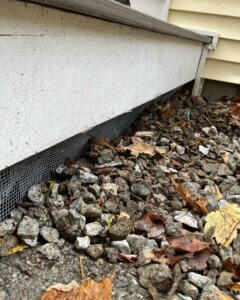
Seal gaps where utilities enter your home. Pipes, wires, and cables create pathways through foundation walls. Use copper mesh and caulk to close these openings. Expanding foam works but degrades over time.
Trim vegetation away from the structure. Branches touching your roof or siding create bridges for ants. Maintain at least a twelve-inch gap between plants and your home. Remove mulch from direct contact with siding.
Store firewood away from the house. Keep it at least twenty feet from the foundation and elevated off the ground. Bring in only what you’ll burn that day. Firewood stored against the house invites carpenter ants to explore further.
Inspect items before bringing them inside. Potted plants, used furniture, and building materials can harbor carpenter ant colonies. A careful look prevents introducing pests directly into your home.
When You Need Professional Treatment
Some carpenter ant problems respond to homeowner efforts. A few foraging workers in spring might just be scouts from an outdoor colony. Reduce moisture, seal entry points, and monitor the situation.
Other situations require professional carpenter ant treatment. If you’re finding frass regularly, hearing activity in walls, or seeing swarmers indoors, you likely have a nest inside the structure. Established colonies resist surface treatments. The queen must be eliminated to stop the colony.
Professional treatment involves locating the parent colony and any satellites. This requires experience and sometimes specialized equipment. Technicians use moisture meters, listening devices, and knowledge of construction to pinpoint nest locations.
Treatment methods vary based on the situation. Non-repellent insecticides allow workers to contact the product and carry it back to the nest. Dust formulations reach voids where liquids can’t go. Baits work when foraging trails are accessible. Most effective treatments combine multiple approaches.
Our pest control services include thorough inspection, targeted treatment, and follow-up monitoring. Carpenter ant control isn’t a one-visit solution. The colony took years to establish. Complete elimination requires patience and persistence.
What to Expect from Professional Service
A proper carpenter ant inspection examines both interior and exterior. Technicians look for moisture damage, wood-to-soil contact, vegetation issues, and signs of ant activity. They’ll check attics, basements, crawl spaces, and anywhere moisture problems might exist.
The inspection report identifies current activity, conditions that attract pests, and recommendations for correction. Some issues you can address yourself. Others require contractors or specialized equipment.
Treatment targets the colony, not just visible ants. Spraying foraging workers provides temporary relief but doesn’t solve the problem. Effective control requires getting product to the nest.
Follow-up visits confirm elimination and catch any resurgence early. Satellite colonies sometimes survive initial treatment. New colonies can establish from outdoor sources. Regular monitoring is part of complete protection.
Long-Term Protection for Your Home
Carpenter ant control combines treatment with prevention. Eliminating the current colony solves today’s problem. Addressing moisture and exclusion prevents tomorrow’s infestation.
Annual inspections catch new activity before significant damage occurs. A trained eye spots early warning signs that homeowners often miss. Prevention costs far less than structural repair.
Know your home’s vulnerable points. Previous moisture damage, old pest activity, and construction details all affect risk. Share this history with any pest control provider. The more information they have, the better they can protect your property.
Carpenter ants aren’t going away. Massachusetts forests will always harbor them. Your goal isn’t elimination from the environment. It’s keeping them out of your structure.
If you’re seeing signs of carpenter ants or other pests in your home, reach out to Bug Bully to schedule an inspection. Catching the problem now prevents far bigger headaches down the road.